LET’S FACE IT + CROP IT – THE DIGITAL MAKEUP ARTIST

TECHNICAL INFOS
Concept & Creative Direction
Marc Perino
AI Prompting & Retouching
Marc Perino
Tools used
Mystic AI (2.5 Beta)
Adobe Photoshop with Retouch4me plugins (which are on sale right now)
Note
⚠️ Due to copyright and privacy reasons all »models« shown below are not human beings – but are images generated with the help of Artificial Intelligence (AI). The tool to generate those images was Mystic AI by Magnific.
Disclosure
Even though I am 100% convinced of the products I write about I have to disclose that this post contains affiliate links and a coupon code. If you use them to make a purchase, I may earn a small commission at no extra cost to you
expand the text below by clicking on the »+« icons
* please read the fine print on the promo page


click on the images to enlarge – when enlarged you can either click on the images to see a progress or you use the left+right arrow keys on your keyboard
MEET YOUR NEW DIGITAL MAKEUP ARTIST:
»FACE MAKE« by Retouch4me
-
DISCLAIMER: I am not a makeup artist and don’t claim to be one. I have the utmost respect for this profession and I don’t think that a human artist will be replaced by this product. For me the plugins described here are just another tool in my tool box when doing my retouching work.
But let’s face it:
As a photographer or retoucher when you are editing your final images – do you sometimes wish that you would have asked your makeup artist on set to use a different lipstick color? Or have her/him add a little blush to the cheeks of the model? Maybe intensify the »smokey eyes« a little bit?Of course you had always the possibility to do that in Photoshop. And to use that method on one single image is probably feasible – but to do it on 20 or 30 images or more will become an impossible and tedious task when you are trying to hit a deadline.
-
Well, that is now possible. Retouch4me – the company that quietly revolutionized the »art of subtle retouching« with their AI tools – has introduced 2 new plugins recently: »Face Make« and »Crop«.
The »Crop« plugin I will mention later. First let’s talk about »Face Make«. I will describe the steps I undertook to get from »Step 01« to »Step 04« with the first image on the left.
In order to write this article I needed an image of a model where I can show the »before« and the »after« stage. But this is a tricky for 2 reasons:I cannot use any images of past clients for legal reasons
Anybody you ask will be hard to convince to use their »before« photo
So I had to »create« a model from scratch I used an AI app called »Mystic« from Magnific AI. I called this part of the process „stage 00“ because it has nothing to do with the retouching process. If you like to know more about this process you can read this article.
-
I deliberately chose to create a model in its most »natural« style – that is without any makeup. When you prompt any motive you get a bunch of images and you have to try a little while before you get some results that fit the image in your mind.
To save credits – each time you generate an image you will be billed in »credits« – I chose to generate in 2K resolution. I used the the (image generating) model »editorial portraits« and the »Magnific Illusio« engine which provided me with the most natural results.
After deciding for one shot of a female model I created a few »upscales« to 4k in order to have more resolution in Photoshop. In the end I decided to use the »Magnific Illusio« engine (again) because this rendering had the least color shifts when upscaling from 2k to 4k.
-
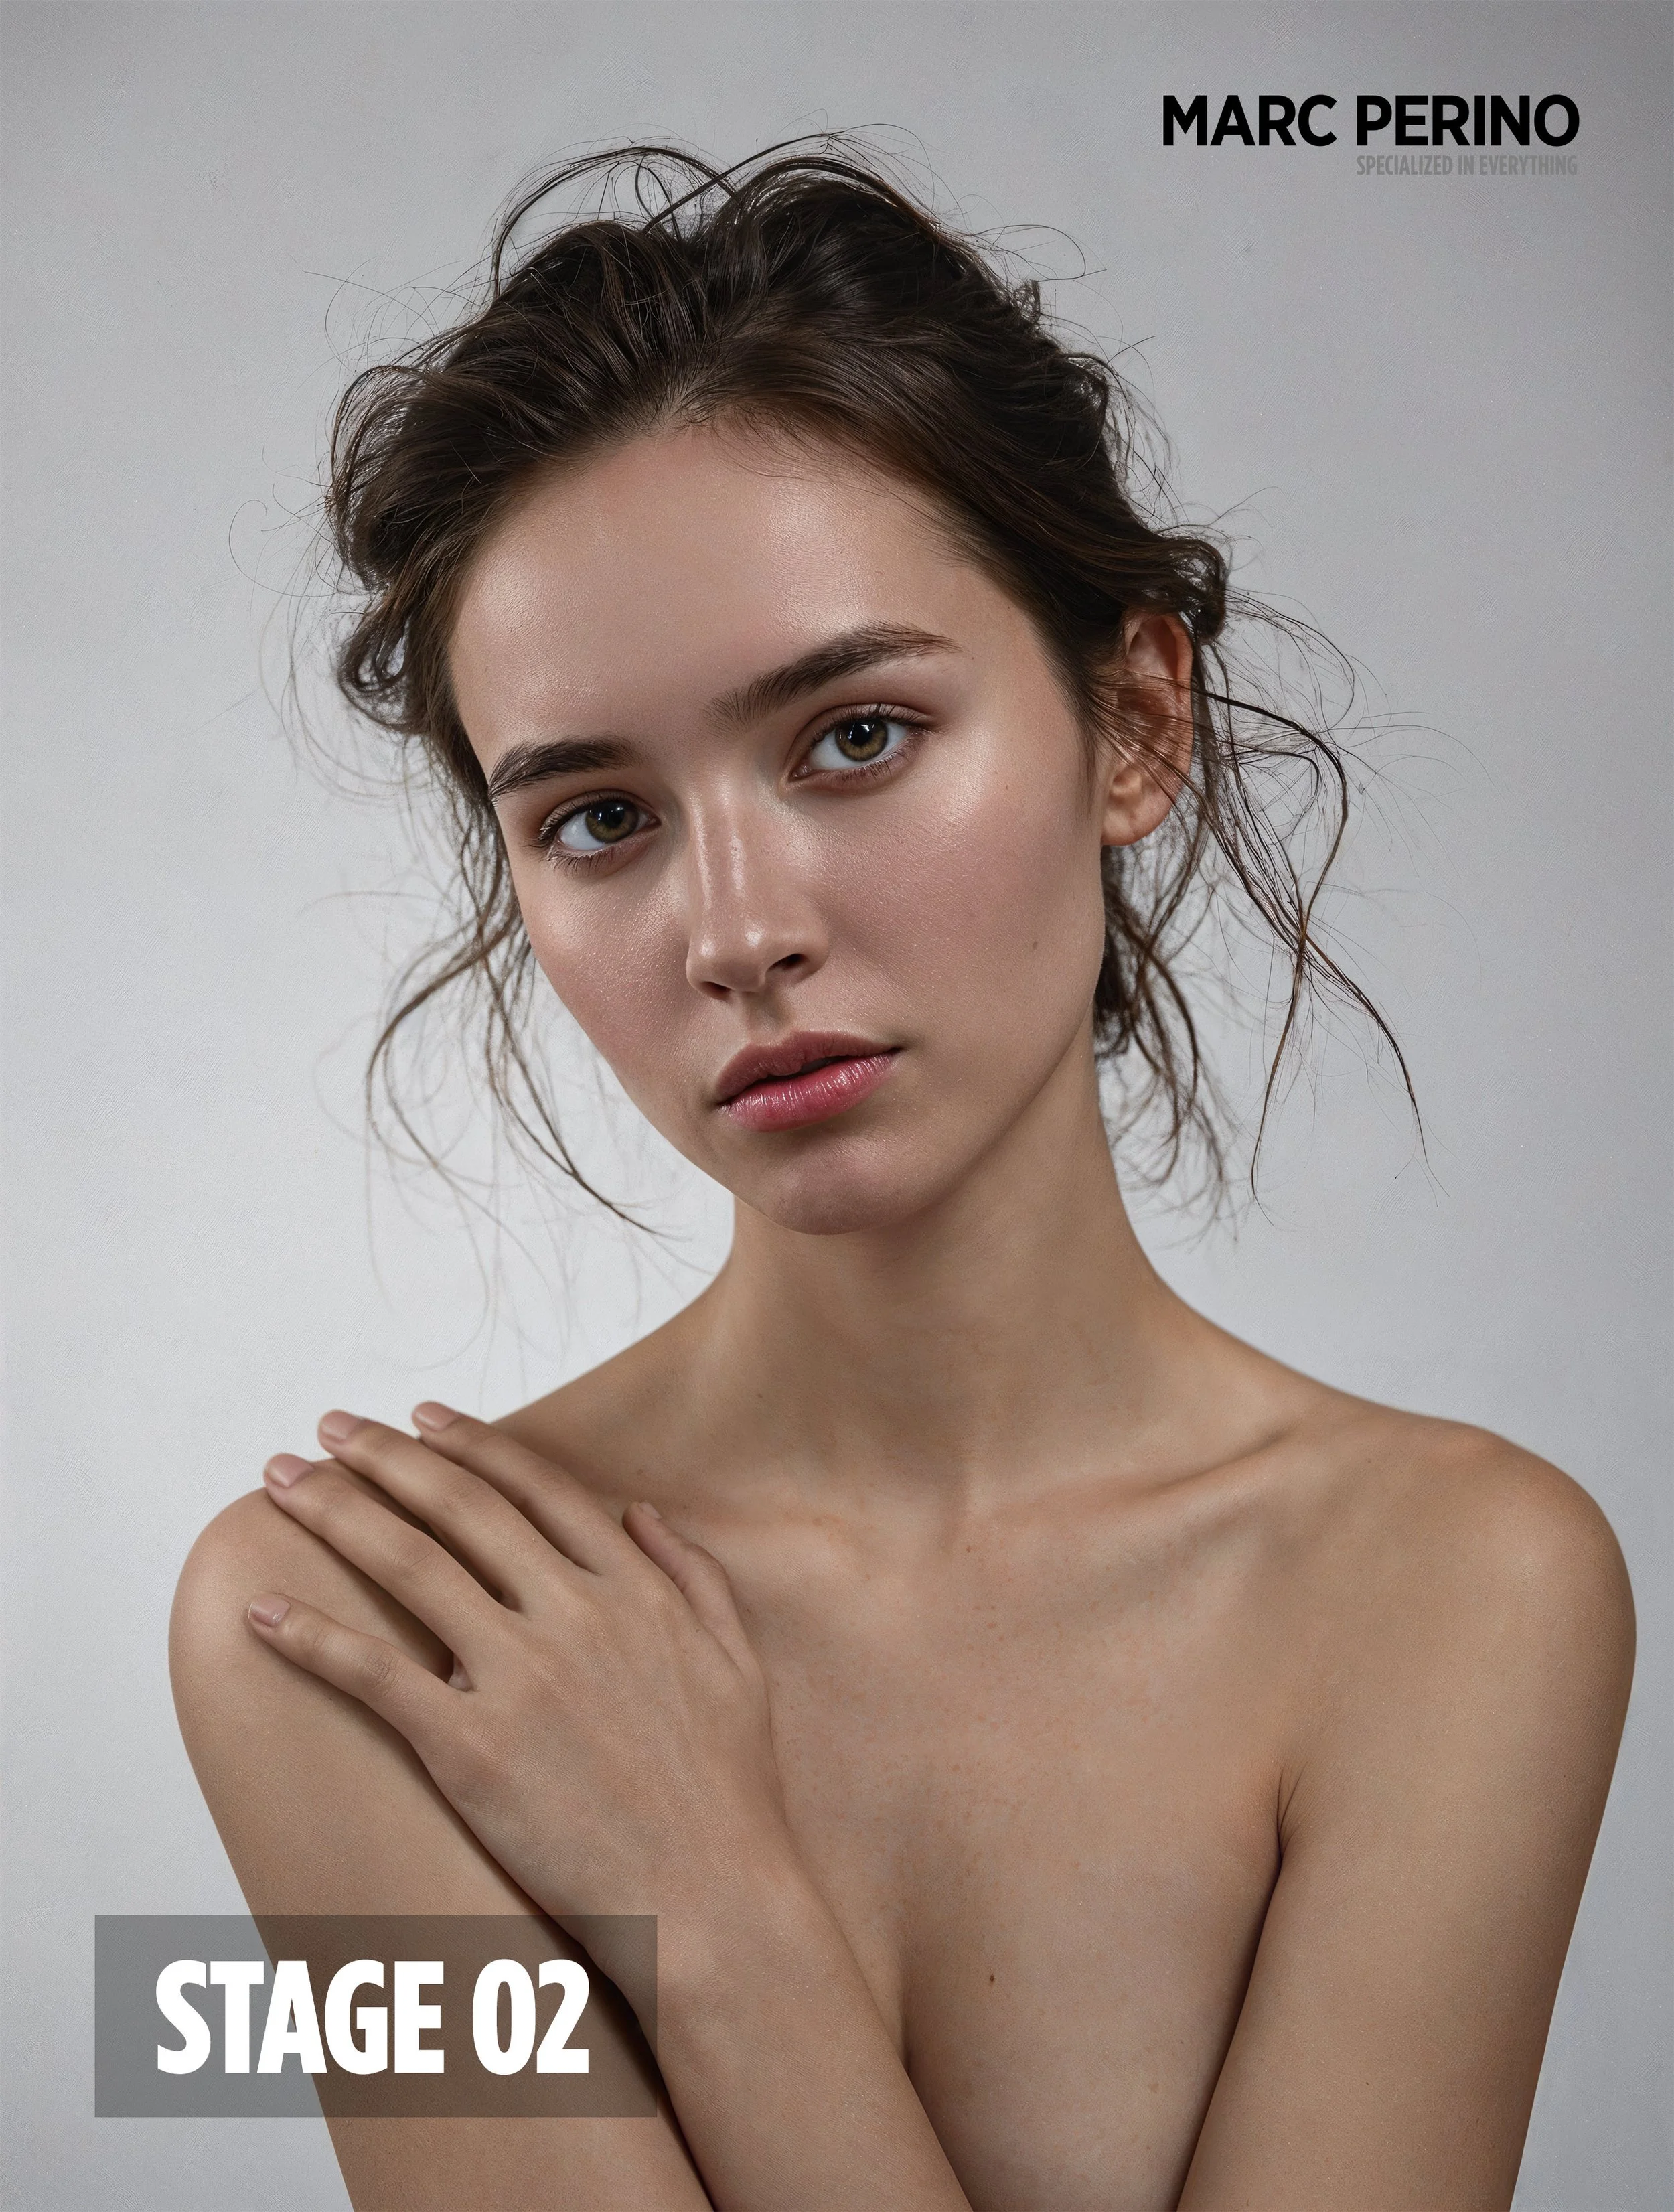
In this stage I ran all of my usual retouch4me plugins over the image. That included:
- the »eyes bundle« which includes »eye vessels« for removing blood vessels and redness + »eye brilliance« for brightening the sclera (the white part of the eyes) and the pupils- the »dodge & burn« which applies this classic technique of the same name which lightens dark areas and darkens too bright areas in your skin in order to even it out but still retains skin pore structure and wrinkles
- the »skin tone« which evens out skin tones and let it appear more natural
- the »portrait volume« which automatically adds depth and dimension to the portraits. It makes eyes brighter, emphasizes lips and nose and makes facial contours stand out more. I it is a very powerful effect if you don’t »overdo« it
Although there is a »mattifier« plugin available I chose not to use it because I liked the shine on her face.
-
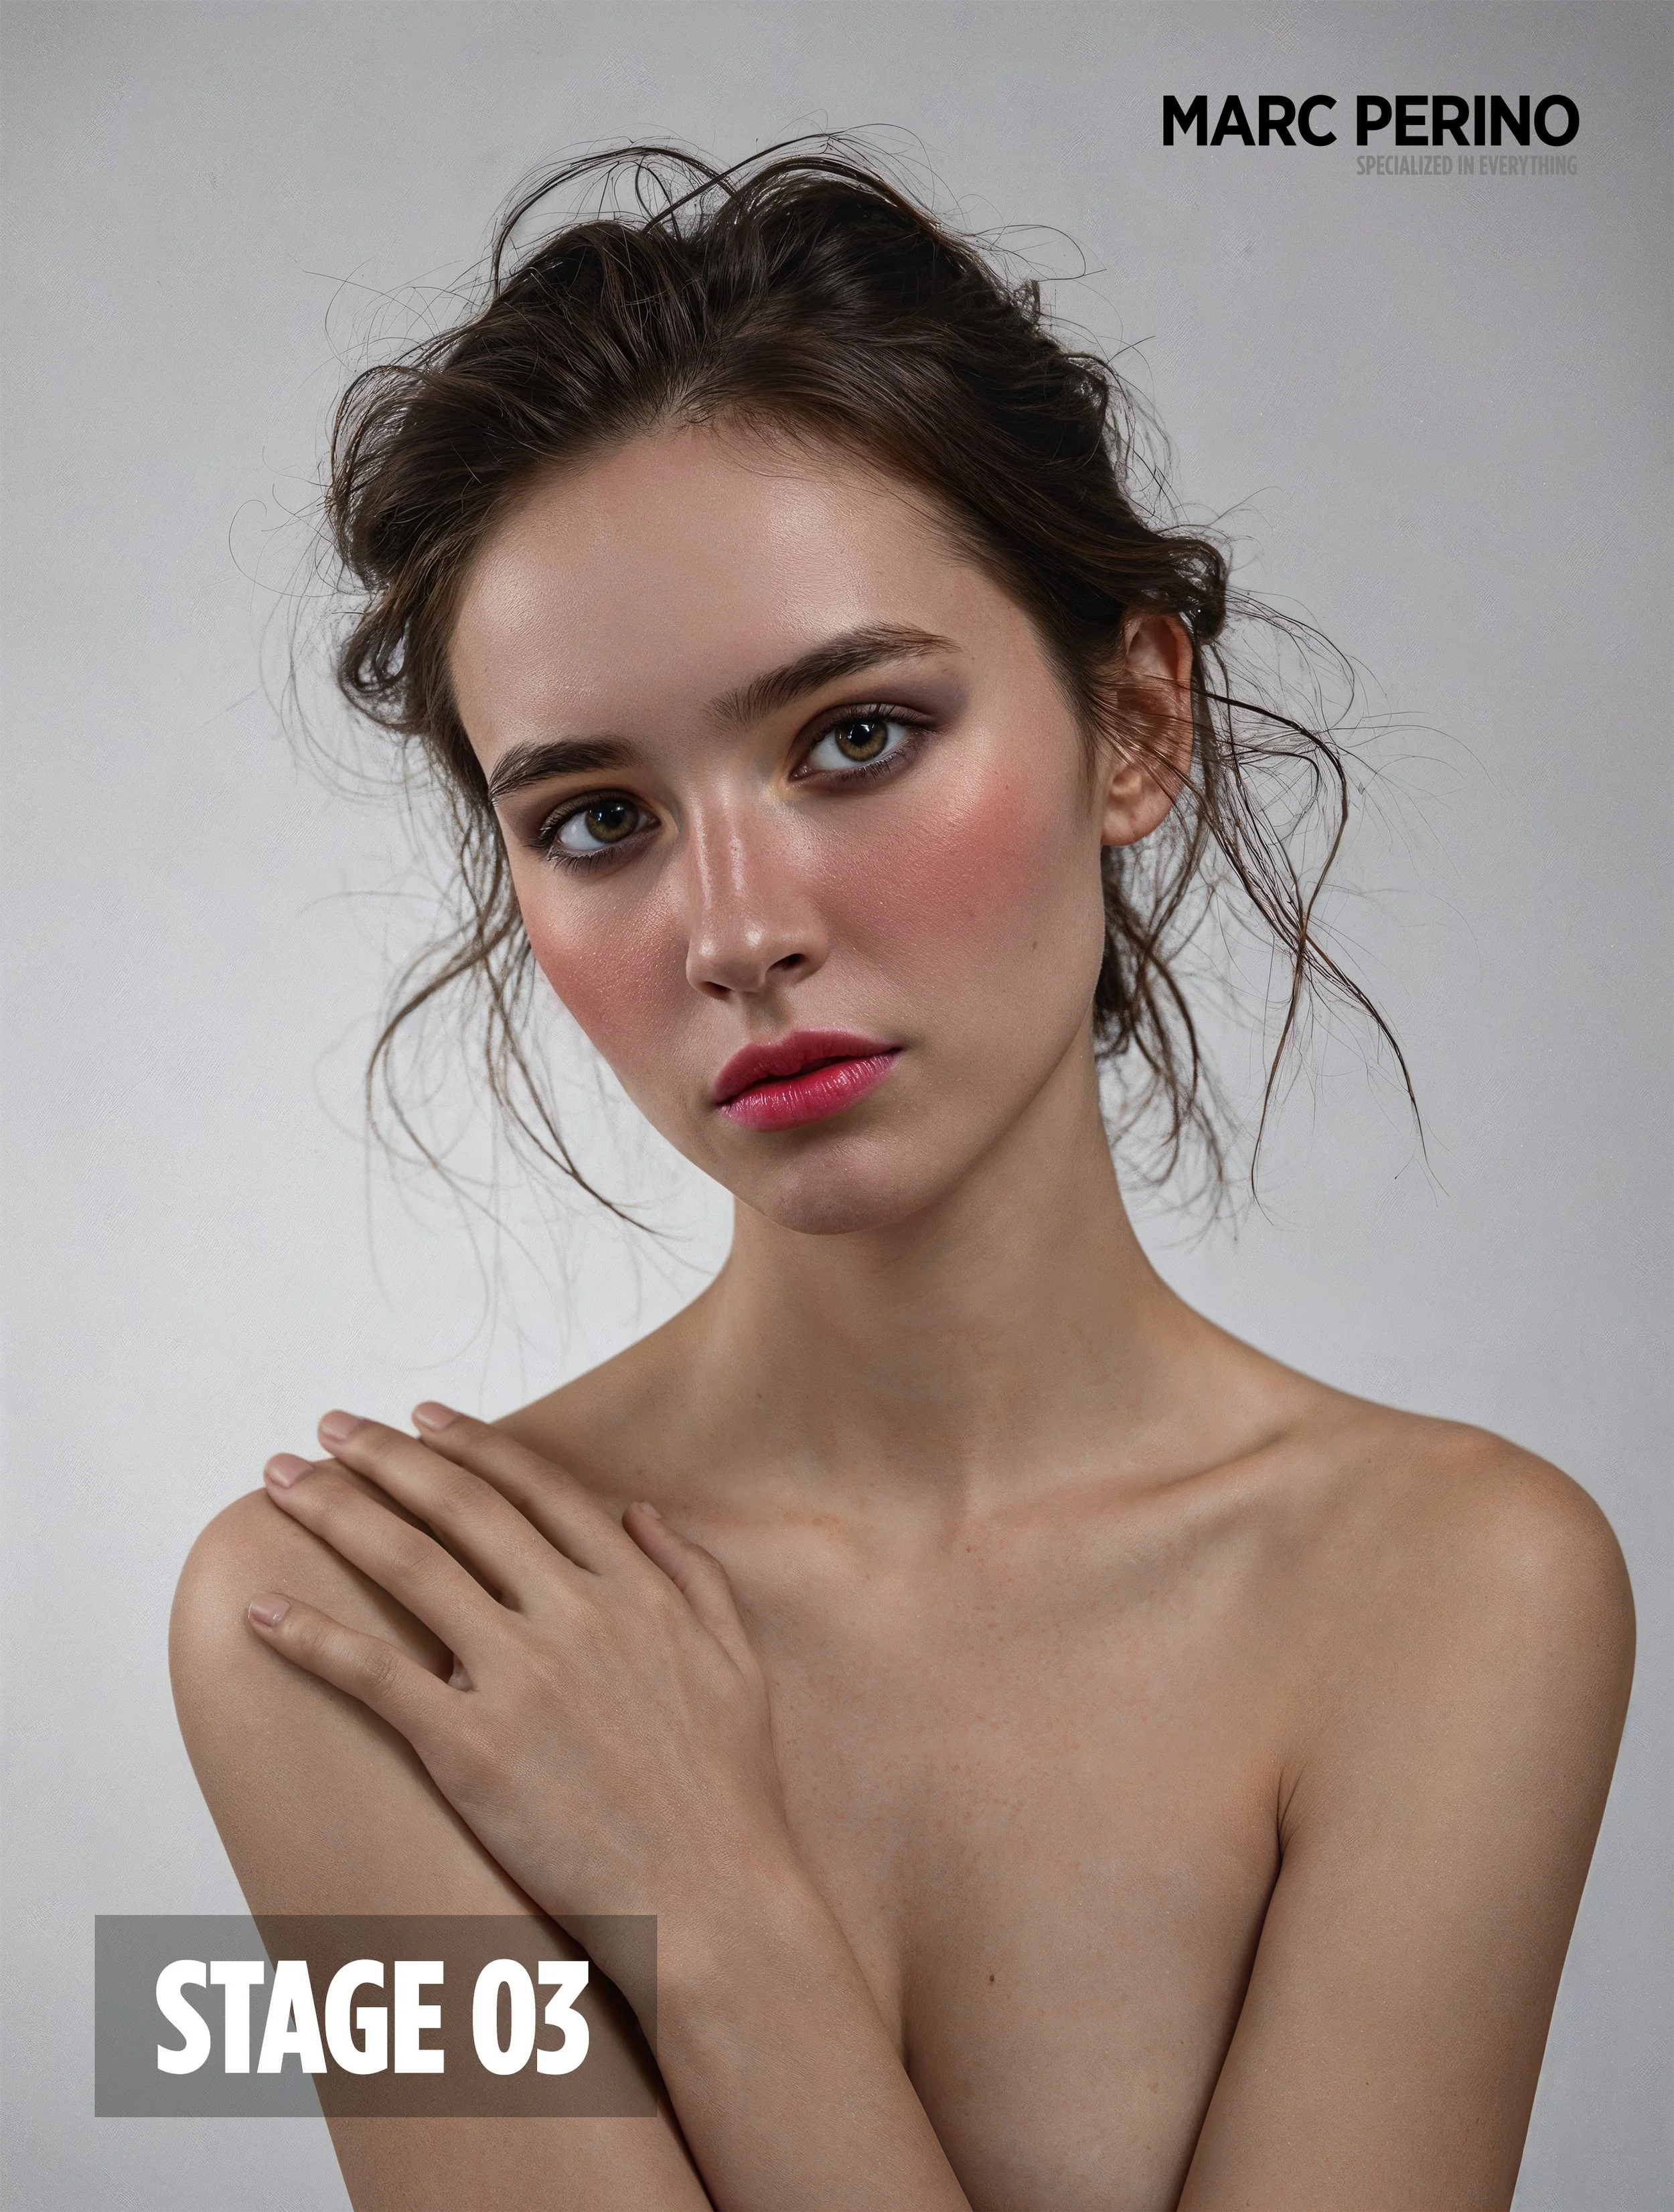
After applying all the plugins above it was time for the new »Face Make« plugin. I like subtle effects – so I tried not to »overdo« it with this plugin. I mostly used the »Makeup« section:
first I applied some »eye makeup« with the »nebula edge« setting set to 90%
for the »lips« I used the »velvet kiss« setting set to 100%
for the »skin« I used the »blushed radiance« setting also set to a 100%
There are many more options for each of these individual settings but the above I liked the most for this particular image. In the end – with just a few clicks – »Face Make« applied a subtle, realistic layer of digital makeup to the model’s face. Think natural blush, enhanced lip color, softly defined eyes — all balanced without ever looking overdone.
The real power behind that plugin are 2 things in my opinion:it applies the effects not like a »flat filter« but reads the contours of the person and applies the ehancements to the three-dimensional shape of a face
I can apply the same effect to MULTIPLE images of the same person in one batch session without having to retouch each photo individually – because although the retouch4me plugins work perfectly in conjunction with Photoshop you can use each plugins as a stand-alone version to batch process many images – you can also batch process with the Photoshop panel in PS itself OR use their ARAMS software if you want to use multiple plugins on multiple images
There is also a section called »lifting« which can dramatically alter or morph the (bone) structure of your model’s face. But I chose not to use it because if you do that to a real person you distort the face to a degree that it does not resemble the person anymore. But it is great fun if you use it for images where a »real person« is not needed (e.g. in advertising or for comedic effects).
To me the main benefit comes from the makeup section.
-
Finally I did a few little classic touchups in Photoshop. I applied the »camera raw« filter to the Stage 3 version:
I lifted the shadows of the lower part of the image
I lifted the exposure and the shadows and increased the contrast of the whole image
I applied some texture and clarity to let the image »pop« a bit more
I increased the temperature to make it slightly warmer
but then I used the »point color« in the »color mixer« to desaturate the skin a little bit
I cut out the model from the background and neutralized the BG to not have any color cast
finally I applied one last »dodge&burn« filter – this filter covered her whole upper body but I excluded the face to not make it too flat
that’s it!
-
With »Face Make« Retouch4me has added a genuinely useful tool to the retoucher’s toolbox. It’s not about replacing the careful work of a professional makeup artist — it’s about giving photographers and retouchers more flexibility after the shoot is over. What once took countless layers and brushes in Photoshop now happens in seconds. In my experience, it works best when used with a subtle hand, adding those small enhancements that bring a portrait to life without making it look over-processed. If you’re already using the Retouch4me ecosystem, »Face Make« feels like a natural extension — and for certain projects, it can really help bridge the gap between a good image and a great one.
CROPPING MADE EASY: Retouch4me »CROP«
Along with »Face Make«, Retouch4me recently released another new tool: »Crop«.
At first glance, cropping might not seem like something that needs an AI solution. But anyone who has ever had to crop dozens (or even hundreds) of images manually knows how time-consuming it can get — especially when trying to maintain a consistent style across a full set.
This is where »Crop« steps in. The plugin automatically detects the subject in the image and proposes a crop based on compositional principles like e.g. the rule of thirds or centered framing. You can adjust the framing style to fit your needs, and of course, you can still fine-tune the result manually if you want.
In my workflow, I see »Crop« less as a tool for final fine art crops, but more as a huge timesaver for getting quick, clean, and consistent framing — especially useful for event series, portraits, or large batches of similar shots. It’s one of those small helpers that, once you start using it, you wonder how you managed without.
You can use it from inside Photoshop but that does not make a lot of sense because you crop in PS a little bit faster. Where it really shines is in batch processing where you can crop dozens or even hundreds of images to certain specific proportions which would be tedious and cumbersome to do it individually. You can do batch processing with the standalone version but also inside of Arams – the free tool from Retouch4me that can automate all your plugins into one application. Although Arams is free you need to pay for the plugins themselves. But you get a pretty good deal all year long thru me on my promo page.
By the way: you can try out all the plugins for free.
* please read the fine print on the promo page


